You have no items in your shopping cart.
Blog / Shooting the Moon on a Smartphone: Five Lessons from Our 28 December 2025 Mobile Photography Class
Shooting the Moon on a Smartphone: Five Lessons from Our 28 December 2025 Mobile Photography Class
Every learner who walked into our mobile photography class on 28 December 2025 already owned a serious camera. It was in their pocket. What they did not yet own was the eye and the handful of deliberate techniques that separate a snapshot from a photograph — and that gap is exactly what two days with a working professional closes.
The class was led by Tan Chin Hock, a well-known Singapore photographer and educator, teaching our CASL - Master Mobile Photography: Capturing Professional Photos with Your Smartphone course. Everything in this post — every image — was shot on a smartphone during and around that run. No DSLR, no tripod rig, no lighting kit. The point of the class is that none of that is required once you know what you are doing.
Lesson 1: Find the lines before you press anything
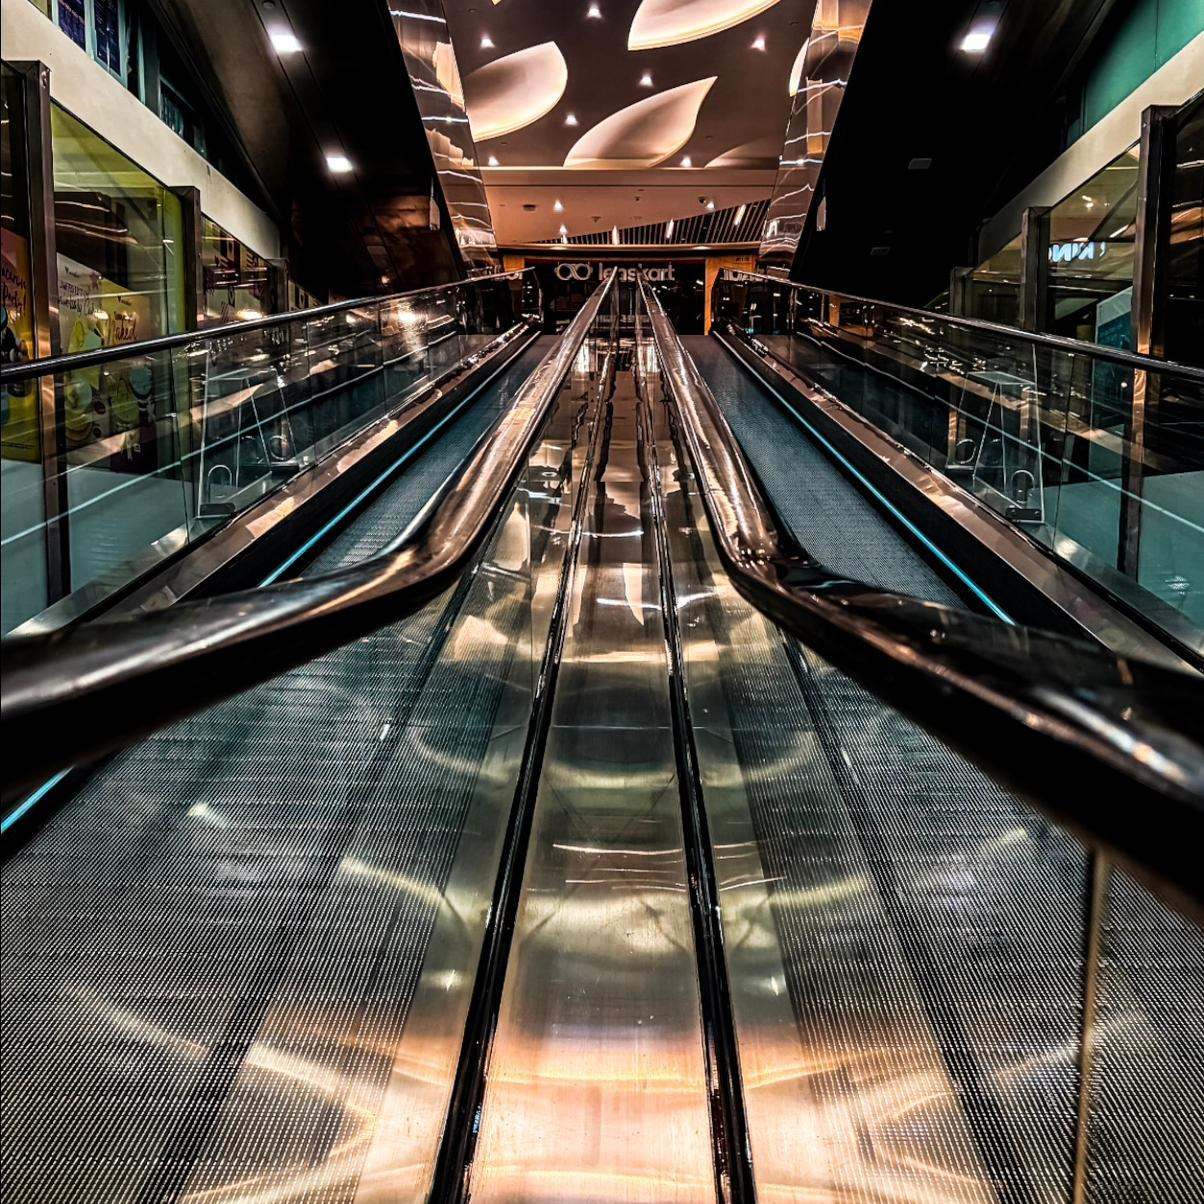
This is an ordinary mall travelator — something thousands of people ride past every evening without a glance. Composed deliberately, it becomes the strongest kind of photograph a beginner can learn to make: a one-point perspective shot where every rail, belt and ceiling line drags the eye to a single vanishing point.
The technique costs nothing. Stand on the centre line, hold the phone level so the symmetry stays honest, and let the geometry do the work. What the class adds is the habit of seeing it: before you shoot, ask what the lines in the frame are doing and where they point. If the answer is nowhere, move your feet. The camera app matters far less than the two steps you take before opening it.
Low light is the second half of this frame. Modern phones handle a scene like this by stacking many short exposures into one clean file — but only if you give them a stable platform. Brace against a railing, tuck your elbows, and let night mode finish before you move. Reflections on polished metal, like the pools of light on these belts, are a gift in phone photography: they lift shadows the sensor would otherwise crush.
Lesson 2: Expose for the moon, not the sky
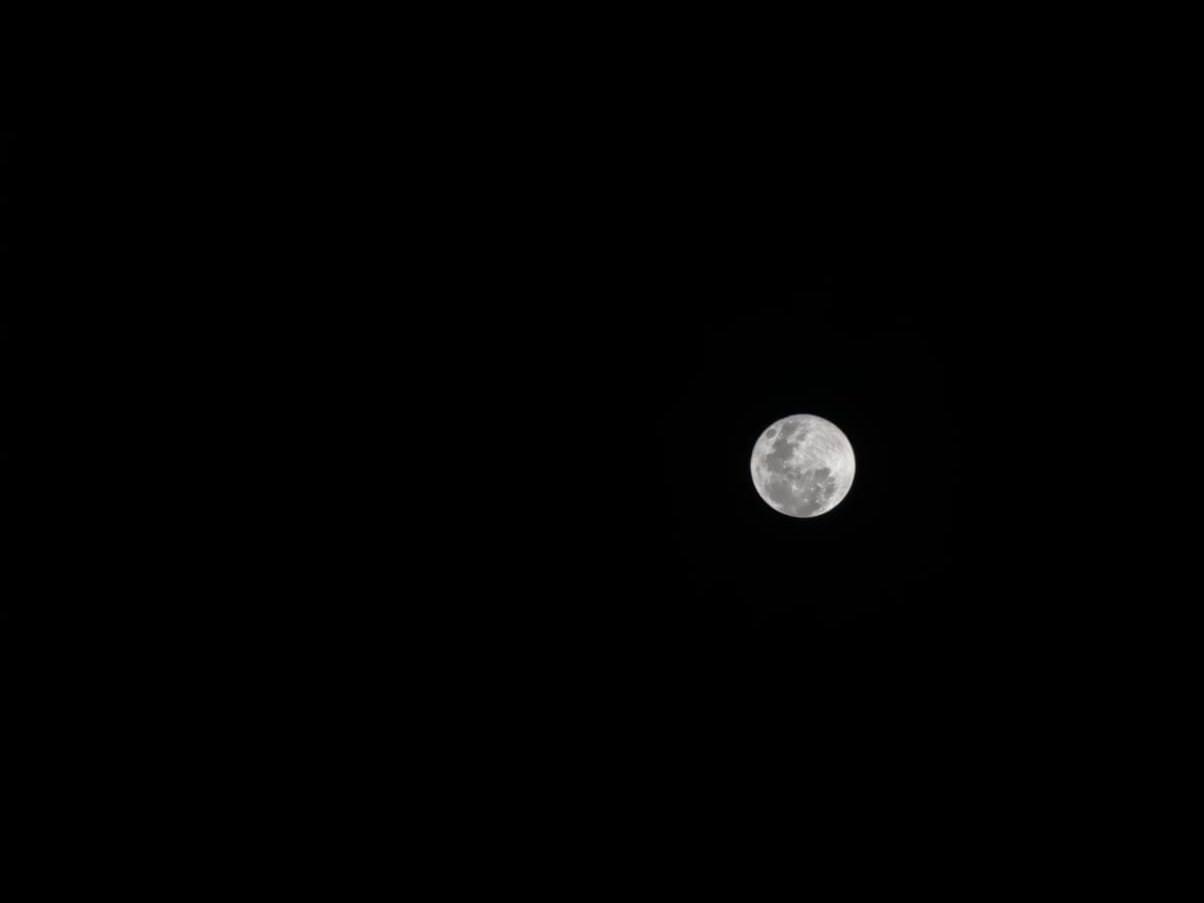
Everyone has tried to photograph a full moon and ended up with a featureless white dot. The class turns that failure into the single most useful lesson in phone photography: the meter reads the whole scene, not the subject. A night sky is overwhelmingly black, so the camera brightens everything — and the one bright object in frame, the moon, burns out to pure white.
The fix takes two seconds. Tap the moon to set focus and metering on it, then drag the exposure slider down until the disc shows texture. On most phones you can long-press to lock exposure (AE/AF lock) so recomposing does not undo it. The sky goes truly black, the moon keeps its detail, and the shot above is the result — handheld, on a phone.
That principle — expose for the highlight you care about and let the shadows fall away — transfers to stage performances, city lights, candle-lit dinners and every other high-contrast scene a phone normally ruins.
Lesson 3: What zoom can really do — and what it needs from you
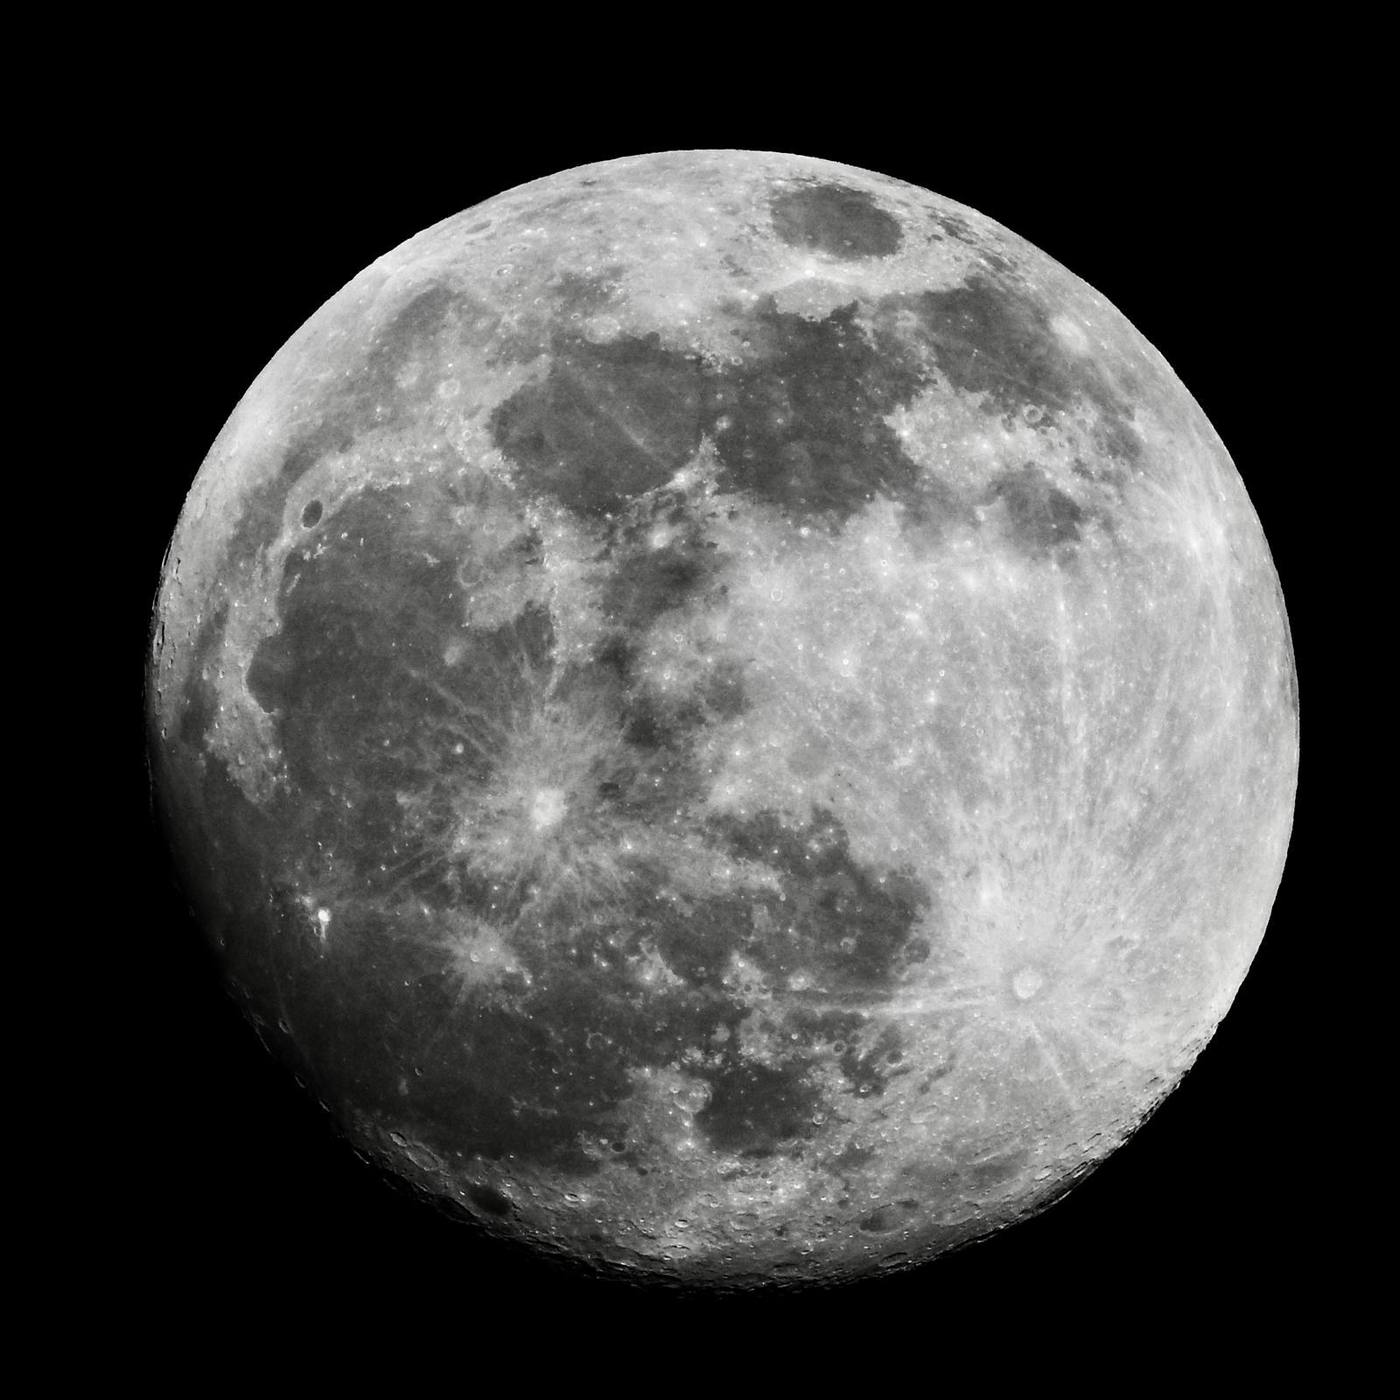
The same evening sky, pushed further: at long zoom a current flagship phone resolves individual craters, the dark maria and the bright ray systems radiating from young impacts. Five years ago this image from a phone would have been dismissed as impossible.
Two things make it work, and both are technique rather than luck:
- Support. At high magnification every tremor is magnified with the image. Brace the phone on a ledge, a wall or both thumbs against your chest — or simply rest it on a surface and use the shutter timer so your finger never shakes the frame.
- Manual exposure, again. Zoomed in, the moon fills more of the frame, but the meter still tends to overbrighten it. The same drag-down of the exposure slider keeps the crater shadows that give the surface its three-dimensional feel.
The class treats zoom honestly: optical and sensor-crop zoom preserve real detail, digital zoom beyond that range is software guessing, and knowing where your own phone crosses that line is worth more than any accessory lens.
Lesson 4: Atmosphere beats sharpness

Then the counter-lesson. This frame keeps the moon small and slightly soft — and it is a better photograph than a razor-sharp lunar close-up would have been, because it is about something: the glow, the lone cloud lit from behind, the black treeline giving the sky a place to stand.
Composition rules from the daytime carry straight over. The treeline anchors the bottom of the frame as a silhouette layer; the moon sits high with generous negative space; a single bright star punctuates the emptiness. Where Lesson 2 was about controlling the camera, this one is about deciding what the picture is for — detail is a tool, not the goal.
Lesson 5: The golden hour is a schedule, not an accident
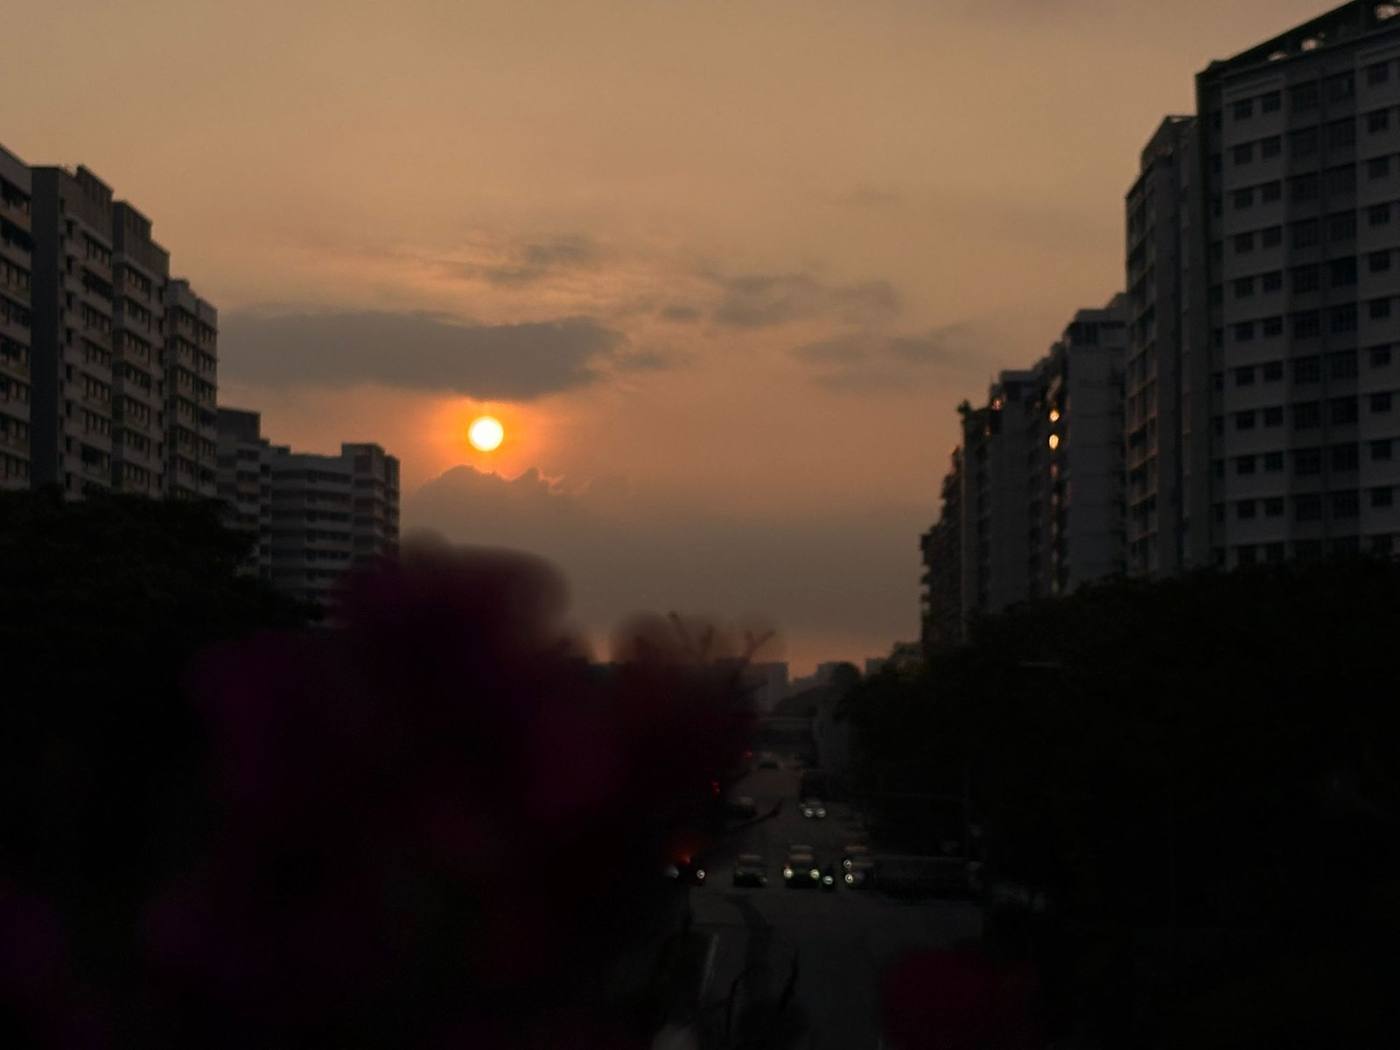
Singapore gives photographers the same appointment every evening: a short window when the light turns warm, the sky holds colour and even an ordinary HDB corridor view becomes worth stopping for. This frame stacks three deliberate choices. The sun is placed between the two rows of blocks rather than dead centre. The soft flowers in the foreground act as a natural frame — out-of-focus foreground is one of the fastest ways to add depth to a phone photo. And the exposure protects the sky, letting the estate fall into silhouette while the phone's HDR quietly keeps the traffic below legible.
The broader habit the class builds: plan for light. Golden hour, blue hour and the position of the sun are all published, predictable and free. Professionals do not wait for good light to happen; they arrange to be standing somewhere interesting when it does.
What the two days actually teach
Look back across the five frames and notice that almost none of it is about owning a better phone:
- Composition first — leading lines, symmetry, silhouette layers, foreground framing, negative space.
- Exposure control — tap-to-meter, exposure compensation and AE/AF lock, the three moves that fix ninety percent of failed phone shots.
- Low-light craft — night mode discipline, bracing, and knowing what stacking can and cannot rescue.
- Zoom judgement — where optical ends and digital guessing begins on your own device.
- Light planning — treating golden hour and moonrise as appointments in your calendar.
The course rounds this out with framing and lighting theory, hands-on practice in real settings, and editing — using popular mobile apps to take a well-captured file the last ten percent to a professional finish.
The course behind the session
CASL - Master Mobile Photography: Capturing Professional Photos with Your Smartphone (course code TGS-2026064718) is a 2-day, 16-hour course at Beginner level with a 2-hour assessment, held at our Woods Square campus, 12 Woodlands Square, Tower 1 — five minutes' walk from Woodlands MRT — and also available as synchronous online training over Zoom.
What it costs
The full fee is $720 before GST. With CASL funding:
| Who you are | Nett fee | Funding |
|---|---|---|
| Singapore Citizen / PR, aged 21 and above | $424.80 | 50% course-fee funding |
| Singapore Citizen aged 40 and above (MCES), or SME-sponsored | $280.80 | 70% course-fee funding |
GST of $64.80 (9%) applies to the full course fee. Eligible Singapore Citizens can apply SkillsFuture Credit and PSEA against the nett fee, NTUC members may claim UTAP, and employers can tap SFEC with Absentee Payroll support — check the course page for the current funding validity window. Completing the course earns a Certificate of Achievement from Tertiary Infotech Academy.
Check the next class date and funding eligibility →
Frequently asked questions
Do I need an expensive flagship phone to join?
No. Every technique in the class — composition, exposure control, night mode discipline, light planning — works on any recent smartphone. A flagship's longer optical zoom extends what is possible (the crater shot above needs one), but the lessons that improve your photographs the most are the ones that cost nothing.
Can a smartphone really photograph the moon?
Yes — if you take control of the exposure. The classic white-blob failure is a metering problem, not a hardware problem: tap the moon, drag the exposure down, brace the phone. With a telephoto-equipped phone and a steady support you can resolve craters and maria, as the photos from this class show.
Does the class cover editing as well as shooting?
Yes. The course covers popular mobile photography and editing apps, so you learn to enhance a well-captured photo to a professional finish — and, just as importantly, to recognise what editing cannot rescue, which is why capture technique comes first.
I have never studied photography. Is this class for me?
The course is Beginner level and assumes no prior photography training. If you can operate your phone's camera app, you have all the prerequisites. Most of the first day is spent building the seeing habits — lines, light, layers — that experienced photographers apply automatically.
Is the course funded?
Yes. CASL funding brings the fee down to $424.80 nett for Singapore Citizens and PRs aged 21 and above, and $280.80 nett for Singapore Citizens aged 40 and above (MCES) or SME-sponsored staff. SkillsFuture Credit, PSEA, UTAP, SFEC and Absentee Payroll support apply — see the course page for details and the current validity window.
Where to go next
The five photographs in this post were made with the camera their photographers already carried. That is the quiet promise of mobile photography: the equipment barrier is gone, and what remains is skill — which is learnable, in a weekend, from someone who has spent a career building it.
- Tonight, try the moon exercise: tap, drag the exposure down, brace, shoot. It is the fastest "aha" in photography.
- Join the next CASL - Master Mobile Photography run with Tan Chin Hock — from $280.80 nett for eligible Singapore Citizens aged 40 and above.
- Shoot one deliberate frame a day — one line, one silhouette, one golden hour — and review them weekly. Volume with intention is how the eye gets trained.